Smoothstepper series: Connect it up
Connect it up
In the first post of our series, we discussed some ways to mount your Smoothstepper in your control box. In this post we would like to share some thoughts on how to connect the boards electrically to you drives, switches, encoders and relays.
The most important connection to make is that between your computer and the Smoothstepper. Needless to say, we insist on using a good quality cable for this. All our Ethernet Smoothstepper bundles ship with CAT-6 Ethernet cables. If you have preferred the USB variant then it would be wise to buy a good quality cable and add a ferrite ring to it.

Thinking of the Smoothstepper 2.5 (USB version) or 3 (Ethernet) parallel ports in one (with benefits of course). So you have the options to go with three breakout boards (BOB) that then connect to stepper drives, switches or relays or an all in one solutions that incorporate the drives and the BOBs. The Smoothstepper is outfitted with 26 pin headers on it that will require suitable ribbon cables. We supply ribbon cables with the D25 port connector on the end as we have seen the boards mostly used with BOB's anyway.
As you may already know, Ports 2 and 3 of the Smoothstepper can have pins 2 to 9 set as inputs or outputs in the plugin. When selecting a BOB, make sure you are getting what you want because usually on port 2, pins 2-9 are input only.
For port 1 only, there is no reason not to go with the generic and readily available and cheap 5 axis breakout board. These boards usually offers optical isolation to your Smoothstepper and sometimes comes with a relay built in. Cheap and cheerful!
In some forum discussions it has been noted that the Breakout board optocouplers may not be as quick at reacting to pulses as the Smoothstepper is to send them. This may be the case on some very cheap breakout boards. On the ones we stock, the reaction time of the worst one was 175ns (nano seconds). That means they are able to accomodate frequencies of up to 5MHz, with the Smoothstepper being able to transmit at up to 4MHz.
A number of other suppliers have expansion boards that link directly to the Smoothstepper with the our recommendations being:
- The PDMX-126 is a very capable board and offers a very neat solution for connecting you Smoothstepper up. This is a top notch board that is worth its money if you are willing to pay the price and import duties from the USA.
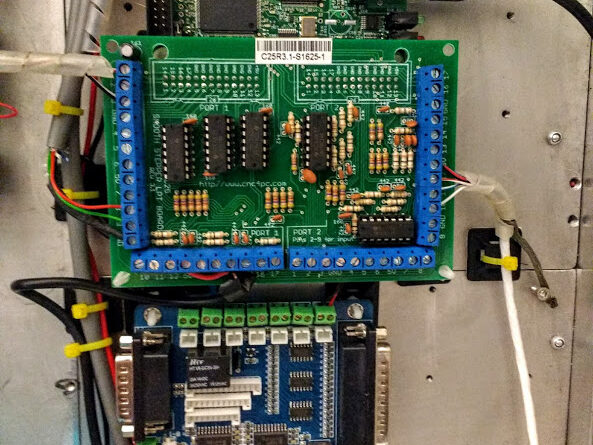
- Our favorite in terms of value is the unassuming C25 as developed and sold by CNC4PC . This board provides a good saftey barrier between the drives, switches and other peripherals and the Ethernet